























Rogue M2 Monitor User Guide

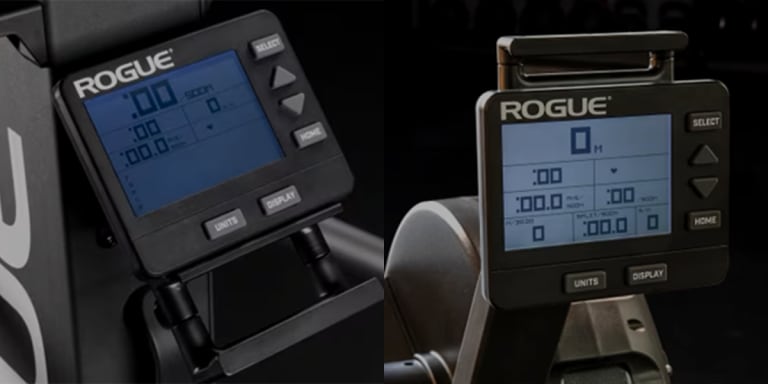
The Rogue M2 Performance Monitor puts the data from every session at your fingertips. Whether you are tracking a hard interval workout, settling into a long endurance session, repeating a benchmark, or connecting your machine to the Rogue App, the M2 gives you the information you need to train with purpose and measure your performance over time.
This guide covers everything you need to get the most from your M2 Monitor, from initial setup and device connections to workout programming, performance displays, training history, and advanced features. Use it to configure your monitor, understand the available training options, and get familiar with the tools available during and after your workouts.
The M2 Monitor is used across the Rogue Echo Rower, Echo SKI, and Echo Bike. While some features vary by machine, the core interface and functionality are designed to provide a consistent training experience across the Echo platform.
For the best experience, keep your M2 Monitor updated with the latest firmware. Firmware updates add features, improve performance, and address bugs as they are identified.
Check the latest firmware for your machine:
Getting Started
The M2 turns on automatically when you:
- Press any button on the monitor
- Begin rowing, skiing, or pedaling
The monitor automatically powers off after a period of inactivity. The default sleep time is 4 minutes and can be adjusted in the Sleep settings.
In Competition Mode, the timeout extends to 12 hours.
To manually enter sleep mode from the Main Menu, press the Home button 4 times.
Set the correct date and time so workouts log accurately in History and sync with the Rogue App. Past workout dates cannot be edited.
- From the Main Menu, select More Options.
- Select Utilities
- Select Date and Time
- Use Up / Down to adjust values and Select to confirm/move between fields
- Select OK to save
Firmware updates for the M2 Monitor are frequently released and include new features, enhancements, and bug fixes. We strongly recommend you keep your firmware up to date with the current version for optimal performance and access to the latest improvements.
Connect the M2 to the Rogue App to access the latest firmware features and improvements.
Download the Rogue App
- From the Main Menu, select More Options > Information > Get Rogue App
- Select iOS for Apple devices and Android for Android devices
- Scan the QR code with the camera on your phone to download the Rogue App on your device.
- The Rogue App can also be accessed here: App Store and Google Play.
- From the Main Menu, select More Options > Information >Product ID
- The Product ID screen displays the following:
○ Product Model Number
○ Firmware Version
○ BLE Version
○ Hardware Version
○ Serial Number
- From the Main Menu, navigate to More Options > Utilities > Language.
- Choose your preferred language from the list.
- From the Main Menu, navigate to More Options > Utilities > Sleep.
- Choose your preferred inactivity timeout duration from the list.
- From the Main Menu, select More Options > Utilities > LCD Contrast
- Select Arrow Up (Darker) or Arrow Down (Lighter) as needed.
- From the Main Menu, select More Options > Utilities > Units
- Select Imperial or Metric as the default unit displayed
Connecting to the Rogue App, Sensors, and Devices
Connecting your M2 Monitor to the Rogue App expands the capabilities and enables a fully connected training experience. Once connected, the M2 Monitor sends real-time performance data directly to the Rogue App, eliminating manual logging and simplifying long-term progress tracking. Athletes can follow structured workouts, monitor pacing and output during each session, and review performance trends across multiple machines using one consistent interface.
- From the Main Menu, select Connect
- Select Connect App. The M2 will display “Ready for App Connection”
- Open the Rogue App on your mobile device
- In the Rogue App, select the Rogue Move icon at the bottom of the screen
- In the Rogue App, select Connect to Equipment at the top of the screen
- Available connections will be displayed. Select the ID that matches the ID displayed on your M2 Monitor by selecting Connect
Once connected, you will be prompted to “Auto-Connect To This Device In The Future?”
Auto-Connect will automatically connect the M2 monitor to the Rogue App in the future when the M2 Monitor is powered on and the Rogue App is running on your mobile device.
This feature is recommended to be used on personal machines or machines that you frequently use. This setting can be changed at any time in the app settings.
A compatible Heart Rate Monitor (HRM) can be paired as a sensor to the M2 monitor to display real-time heart rate data during your workout.
Follow these steps to sync your chest strap or armband HRM to the M2 Monitor:
- Confirm Compatibility The Rogue M2 Monitor is compatible with both Bluetooth and ANT+ heart rate monitors. This includes most modern chest straps (like the Polar H10 or Garmin HRM-Pro) and optical armbands. Note: If you are unsure of your model, please see more details on compatible HRMs below.
- Prepare the HRM Put on your heart rate monitor. If you are using a chest strap, it is recommended to wet the electrode pads with water to ensure a strong electrical contact with your skin.
- From the M2 Monitor Main Menu, select Connect.
- Use the Down Arrow to highlight Connect Heart Rate, then press Select.
- The M2 will begin scanning for nearby Bluetooth and ANT+ signals. This process can take up to 10 seconds.
- Once found, the name or ID of your HRM will appear on the M2 screen. Highlight your device and push Select.
- Your current heart rate (BPM) will be displayed on the screen. Push Select once more to confirm the selection.
- Push the Home button once to return to the main menu. From there, select your desired workout mode. Your heart rate will now stay visible on the console throughout your session.
- When connected, a heart icon will appear at the top of the M2 display.
Heart Rate Monitor (HRM) Compatibility
The Rogue M2 Monitor is compatible with both Bluetooth and ANT+ heart rate monitors.
- ANT+: Best for stable, low-interference connection.
- Bluetooth Low Energy (BLE): Standard for most modern wearable sensors.
- Troubleshooting Tips
- No Signal: Ensure the HRM strap is tight enough against the skin and the electrodes are sufficiently moist.
- Device Not Found: Check that your HRM is not currently “locked” to another app or device (like a phone or tablet), as some older Bluetooth monitors only allow one connection at a time.
- Battery: If the M2 fails to find the sensor after several attempts, the battery in the HRM strap may need replacement
How Heart Rate Data is Stored
When using a compatible heart rate chest belt, the M2 Monitor records heart rate data as follows:
- Splits: Stores the last valid heart rate recorded at the end of the split.
- Work intervals: Stores the last valid heart rate recorded at the end of the interval.
- Rest periods during variable interval workouts: Stores the heart rate at the end of the rest period.
- Rest periods during time or distance interval workouts: The ending heart rate is not stored.
Les montres Garmin compatibles peuvent être jumelées comme capteur au moniteur M2 pour collecter les données d'entraînement et d'activité qui seront stockées dans Garmin Connect.
- Dans le menu principal M2, choisissez Connecter
- Select More ANT+ Options
- Sélectionnez ANT+ FE-C
- On your Garmin device, confirm “Broadcast Heart Rate” is enabled.
- Sur votre appareil Garmin, recherchez les capteurs et connectez-les.
- Once a the device is paired, start a Row Indoor or Bike Indoor activity on the device
- Commencez l'entraînement
- À la fin de l'entraînement, mettez fin à l'activité sur votre appareil Garmin.
Firmware Compatibility
This feature is supported on the following firmware versions and newer:
Echo Bike: 30.1.36
Echo Rower: 1.1.81
Echo SKI: 20.1.70
Compatible Apple watches can be paired as a sensor to the M2 monitor to collect workout metrics and activity to be stored in Apple Health.
Important: You do not need to pair your watch separately.
When you connect the Rogue App on your iPhone to the rower, your Apple Watch will automatically connect at the same time.
This dual-connection allows for seamless data flow between the monitor, your phone, and your wrist.
- Download the Rogue App on your iPhone. (See instructions above on this page)
- This will automatically install the companion app on your Apple Watch.
- Launch the app on your phone and ensure Bluetooth is enabled.
- From the Main Menu, select Connect
- Select Connect App. The M2 will display “Ready for App Connection”
- Open the Rogue App on your mobile device
- In the Rogue App, select the Rogue Move icon at the bottom of the screen
- In the Rogue App, select Connect to Equipment at the top of the screen
- Available connections will be displayed. Select the ID that matches the ID displayed on your M2 Monitor by selecting Connect
- Once the phone is linked, the Apple Watch app will activate, sharing your heart rate and allowing you to control the workout from your wrist.
Principales caractéristiques
- Heart Rate Sharing: Your watch automatically broadcasts your heart rate to the M2 monitor via the app.
- Wrist Control: Start, pause, or end your workout directly from the Apple Watch interface.
- Auto-Reconnect: Upon connecting, you will be prompted to "Remember this device."
- If accepted, the machine will automatically link to your phone and watch in future sessions.
- Manage these preferences in Settings > Manage Apps & Devices within the Rogue App.
Firmware Compatibility
This feature is supported on the following firmware versions and newer:
Echo Rower: 1.1.84
Echo Bike: 30.1.36
Echo SKI: 20.1.73
The Monitor ID is used to identify your M2 monitor when making a Bluetooth connection.
- From the Main Menu, select Connect
- The Monitor ID is displayed at the bottom of the screen
Note: The Monitor ID is the last 6 digits of the Serial Number.
Workout Options and Features
There are three main ways to start a workout on the M2 Monitor:
- Just Row / Just Ride / Just Ski
- Preset Workouts available on Standard and Custom Lists
- Create Custom Workouts
Start a free-form workout immediately. All data is recorded and saved to History upon completion. Use Display and Units to customize views. Press Home during the workout to bring up the “Workout Finish” prompt and end/save. Projected finish shows an estimate based on 30 minutes.
From Select Workout, the M2 offers several preset options on the Standard List and Custom List menus.
Standard List includes common workouts, including:
- 2000M
- 5000M
- 10,000M
- 30-Minute
- 500M intervals with 1 minute rest
Custom List includes common workouts in addition to your previous 30 workouts. (Just Row/Ski/Bike workout sessions are excluded from this)
Once all 30 slots are filled, you will be prompted to select a previous workout to replace if you want to save your most recent completed workout.
The fixed common workouts in this list include:
- Tabata intervals
- 42,195M (Marathon row)
- Other pre-set interval workouts
Highlight the desired preset using Up / Down, then press Select to begin.
- From Select Workout > New Workout, choose Single Time, Single Distance, or Single Calories.
- Use Up / Down to set the target value (hours, minutes, seconds, meters, or calories).
- Use Units / Display to move the cursor left or right to cycle through all settings.
- Press Select to confirm and start the workout.
Single Distance
A Single Distance workout lets you set a target distance, such as 500m, 5,000m, or 10,000m, and work until the distance is complete. During the workout, the monitor counts down the remaining meters and displays your final time to the tenth of a second when finished.
Single Time
A Single Time workout lets you set a target duration, such as 30 minutes or 1 hour, and continue until the programmed time expires. During the workout, the monitor counts down the remaining time and displays your total distance at the finish.
Single Calorie
A Single Calorie workout lets you set a calorie target, such as 10, 25, or 50 calories, and continue until the programmed calories are burned. During the workout, the monitor counts down the remaining calories and displays your final time to the tenth of a second when finished. To view the total distance completed during the workout, review the result in history.
- From Select Workout > New Workout > Interval, choose between Distance, Time, Calorie, Custom
- Use Up / Down to set the target value (hours, minutes, seconds, meters, or calories).
- Use Units / Display to move the cursor left or right to cycle through all settings.
- Press Select to confirm and start the workout.
Intervals
Interval workouts alternate between periods of work and rest. During rest periods, you can either stop completely or continue moving at an easy pace.
Choose from constant intervals (fixed work/rest) or custom intervals. Set number of rounds, work time/distance/calories, and rest periods. The monitor tracks each interval separately with rest countdowns and displays interval number on screen.
Interval workouts can be configured in several ways:
- Time Based: Work for a set amount of time, followed by a programmed rest period before the next interval begins.
- Distance Based: Work for a set distance, followed by a programmed rest period before the next interval begins.
- Calorie Based: Work until a target number of calories is reached, followed by a programmed rest period before the next interval begins.
- Custom: Combine different time, distance and/or calorie intervals with rest periods between each segment.
Rest Time: Fixed or Undefined
When setting up an interval workout, rest time can be programmed as either a fixed duration or undefined.
Undefined rest allows the recovery period to remain open-ended and is useful for workouts that combine rowing or skiing with off-machine movements such as running, weightlifting, or other functional training exercises.
Undefined rest has a max duration of 10 minutes.
Setting Up a Workout with Undefined Rest
This allows undetermined rest time for intervals (e.g., for CrossFit-style workouts with off-machine activities).
- From Select Workout > New Workout > Interval, choose between Distance, Time, Calorie, Custom
- When “Set Rest Time” is blinking, press Up to select “Undefined Rest Time.”
- Press Select to confirm and start the workout.
- Press Continue after each off-machine rest to start the next interval.
- Undefined rest has a max duration of 10 minutes.
Reviewing Results for Undefined Rest Interval Workouts
Total Time shows work plus rest; summary time excludes rest. Last interval may show zero-meter time for accuracy.
Select a past workout from History and repeat it exactly (same target distance/time/calories or interval structure). The monitor will guide you with the previous pace as a target for comparison.
- From the Main Menu, select Repeat
- Use Up / Down to set the workout to repeat
- Select View Detail to view the full details and splits of that workout
- Select ReRow, ReRide, ReSki to confirm and start the workout.
View all logged workouts:
- From the Main Menu, select History
- Select Summary to view total distance, total time, number of workouts, and workout metric averages.
- Select Monthly to view the monthly total time and distance for the last 12 months.
- Select List by Date to view all workouts chronologically
- Select List by Type to view workouts by type: Single Distance, Single Time, Single Calorie, Intervals
- Press Select to view the full details of each workout
- Press Home to go back to the previous menu
- From the Main Menu, select History > Delete Workout
- Select List by Date to search all workouts chronologically
- Select List by Type to search workouts by type: Single Distance, Single Time, Single Calorie, Intervals
- Press Select > Delete to delete a selected workout
During any workout, press the Display button to cycle through the 5 available data layouts.
These provide different views of your real-time metrics.
The Units button cycles through 4 unit variations on each layout.
The monitor always shows heart rate if paired with a compatible Bluetooth / ANT+ heart rate monitor.
The five display layouts are:
Full Data
The Full Data display provides the most detailed view of your workout performance.
This display shows the following metrics:
- Elapsed or remaining time
- Distance
- Strokes per minute (SPM) or revolutions per minute (RPM on Echo Bike M2)
- Current pace displayed as pace per 500M or 1000M (Echo Bike), calories, or watts
- Average pace, calories, or watts, or total accumulated time and distance
- Split data including split time, distance, pace, calories, or watts
- Projected finish information:
○ Time workouts: Estimated total distance completed by the end of the workout
○ Distance workouts: Estimated time required to complete the workout. (For Just Row, Ski, or Ride workouts, the projected finish defaults to 30 minutes)
○ Interval workouts: Estimated finish distance or time for the current interval
Force Curve
The Force Curve is a line graph of your power application during the stroke. A smooth curve shape indicates a smoother and consistent application of force. In general, a larger area under the curve reflects a stronger stroke. Aim for a broad, consistent force curve without peaks or irregular fluctuations, as this indicates a smooth and continuous drive.
When viewing this display, the M2 shows workout data on the top half of the screen and the force curve for each stroke on the bottom half.
- Elapsed or remaining time
- Distance
- Strokes per minute (SPM) or revolutions per minute (RPM on Echo Bike M2)
- Current pace displayed as pace per 500M or 1000M (Echo Bike), calories, or watts
- Force Curve
Pacer
The Pacer display allows you to row/ski/ride against a target pace. When viewing this display, the M2 shows the below workout data on the top half of the screen and a visual pace comparison on the bottom half.
- Elapsed or remaining time
- Distance
- Strokes per minute (SPM) or revolutions per minute (RPM on Echo Bike M2)
- Current pace displayed as pace per 500M or 1000M (Echo Bike), calories, or watts
- Pacer
You can define a target pace when setting up a new workout.
If you don’t set a target pace, the pacer matches your current workout pace.
Heart Rate Graph
The Heart Rate Graph displays a live visual bar graph of your heart rate, graphing a new bar every 10 seconds throughout the workout. The higher the bar, the higher your heart rate.
When viewing this display, the M2 shows the below workout data on the top half of the screen and the heart rate graph on the bottom half.
- Elapsed or remaining time
- Distance
- Strokes per minute (SPM) or revolutions per minute (RPM on Echo Bike M2)
- Current pace displayed as pace per 500M or 1000M (Echo Bike), calories, or watts
- Heart Rate Graph
Summary Display
The Summary display shows the core metrics only for a simplified, large font view.
This display shows the following metrics:
- Elapsed or remaining time
- Distance
- Strokes per minute (SPM) or revolutions per minute (RPM on Echo Bike M2)
- Current pace displayed as pace per 500M or 1000M (Echo Bike), calories, or watts
The M2 displays results two ways: overall workout totals and per-split/interval breakdowns. Splits show time, distance, pace, watts, or calories for each segment. In interval workouts, it also shows interval number and rest periods. Splits are automatically saved to History.
By default, the monitor breaks most workouts into fifths; so a split is 1/5 of a workout. A 5000M row uses 1000M splits.
When creating a new workout the splits are customizable.
Splits apply to single distance or single time workouts. Interval workouts are not formatted to utilize splits in the same way.
Splits and Early Termination
If you end a workout early, the M2 stores it as a Just Row / Just Ride / Just Ski workout. These workouts are stored using 5-minute splits, with a maximum of seven splits saved to conserve memory space. Once the workout exceeds 35 minutes and requires more than seven splits, the monitor automatically switches to 10-minute splits. If the workout exceeds 70 minutes, the monitor switches to 20-minute splits. This process continues as needed to keep the total number of stored splits at seven.
The M2 displays output in three different units. Press Units to cycle between them
- Pace / 500M (Echo Bike is /1000M) - Displays how long it takes to row or ski 500 meters, or bike 1000 meters. Lower values indicate a faster pace. The monitor shows both your current pace for each stroke and your average pace for the workout
- Watts - Displays your power output in watts. Higher values indicate greater power production. The monitor shows watts for each stroke along with your average watt output for the workout
- Calories Displays the estimated number of calories burned. Higher values indicate more calories burned. During the workout, the monitor shows total calories burned and converts this data into a Calories-per-hour value. Calorie calculations are based on a formula using a 175LB individual.
Stroke rate is the number of strokes per minute (SPM) or cadence (RPM on the Echo Bike) This metric appears on all displays as both your current rate and average for the workout.
Common Stroke Rates
Rowing: 24-30 SPM
Skiing: 30-40 SPM
Cycling: 60-100 RPM
- Press Home during a workout to stop the workout
- Press Display to view the workout detail
- Press Home again to save the workout and return to the Main Menu
- Workouts are automatically saved to History upon completion (minimum thresholds may apply for very short sessions).
Additional Features and Maintenance
- From the Main Menu, select More Options > Information > Contact Support
- Scan the QR code with the camera on your phone to submit feedback to Rogue Support.
- The form can also be accessed here: Rogue M2 Console Feedback Form
- You can expect a reply within 24 hours