
























How to Use a Rogue Rack Safely & Effectively
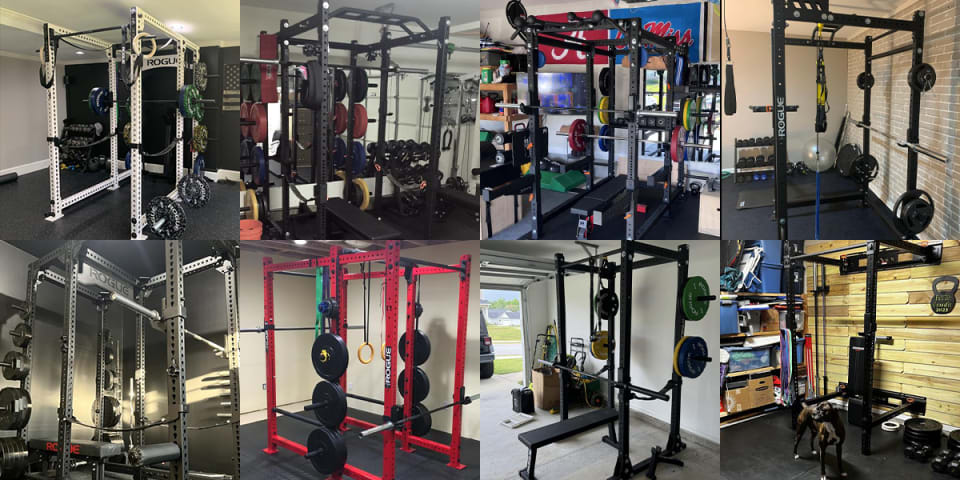
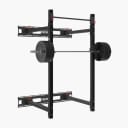
A rack, often called a squat rack or power rack, is the centerpiece of most home and commercial gyms. Back squats, front squats, bench press, overhead press, rack pulls and pull-ups, and more can all be done in the same rack, but the J-Cups and safeties have to be set up to match the athlete and the movement.
Compared to a squat stand, a rack typically uses four uprights that you work inside of and supports a wider range of safety systems and attachments. A squat stand uses two uprights and does not need to be anchored to the floor, which makes it more compact and portable, but can limit the amount of safeties and accessories available for it. This guide covers Rogue’s racks, the Monster, Monster Lite and Infinity Series lines, along with the stand-alone Flat Foot Racks and how to use them for a safe and effective workout.
Rogue’s Rack Lineup
Rogue’s rack attachments are not always interchangeable. Each rack uses its own upright size, hole pattern and hole size, so the J-Cups and safety system built for one series will not fit another.
MONSTER SERIES
The Monster Series is Rogue’s most popular heavy-duty rack line, built from 3″ x 3″ 11-gauge steel and oversized 1” hardware, giving it the strength to handle any training environment from a home gym to a full facility build-out.
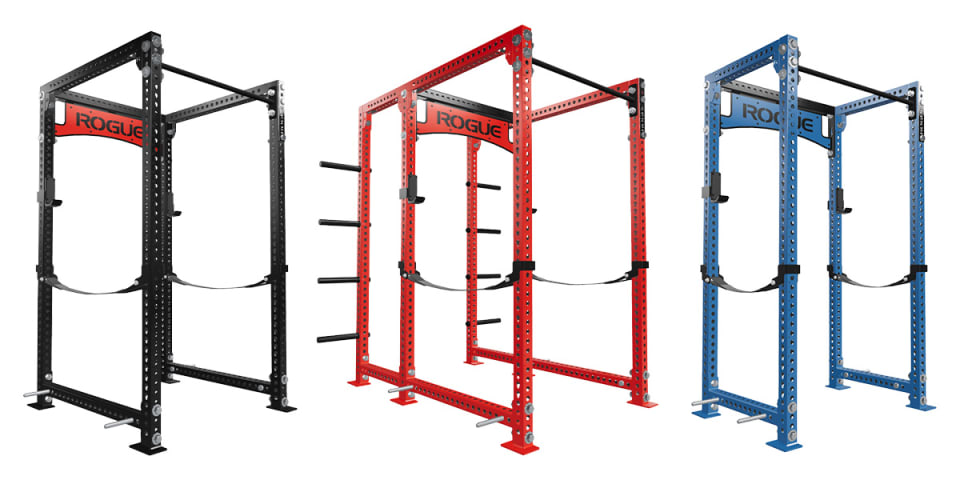
- Available as the RM-3, RM-4 and RM-6, in 24″, 30″ or 43″ depth options and 90”, 100”, and 108” heights
- Uses a 2” hole pattern, with numbered holes on the front and back of the uprights for quick reference
- Most Monster racks need to be bolted to the floor, though the larger RM-6 footprint does not strictly require it
- Compatible with Monster J-Cups and Monster safety systems only
MONSTER LITE SERIES
The Monster Lite Series offers the same 11-gauge uprights but uses 5/8” hardware, making it a lighter build that can still handle anything you throw at it.
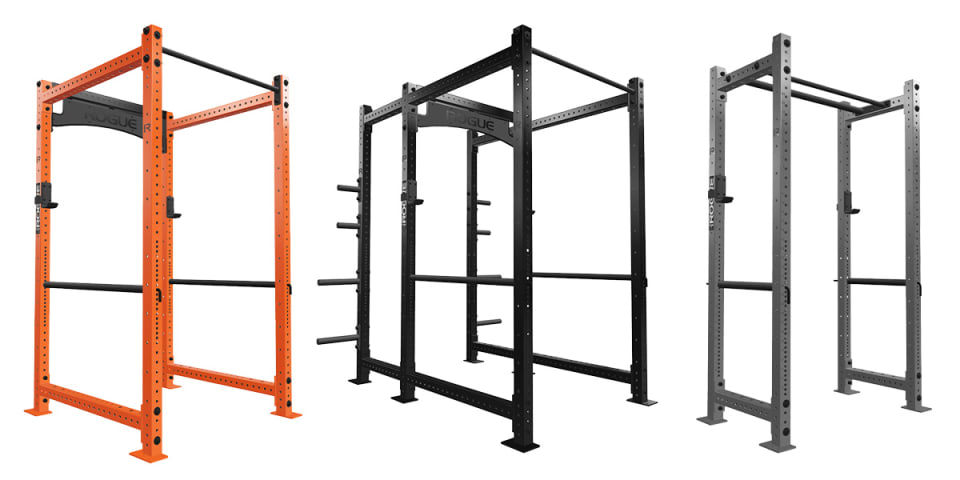
- Available as the RML-390, RML-490 and RML-690, following the same depth and footprint progression as the Monster Series
- Uses the Westside hole pattern, with 1″ spacing through the bench and clean-pull zones and 2″ spacing elsewhere
- Most Monster Lite racks need to be bolted to the floor, though the larger RML-690 footprint does not strictly require it
- Compatible with Monster Lite J-Cups and Monster Lite safety systems only
INFINITY SERIES
The Infinity Series is Rogue’s original rack line, using a 2″ x 3″ upright and the Westside hole pattern built for fine adjustment.
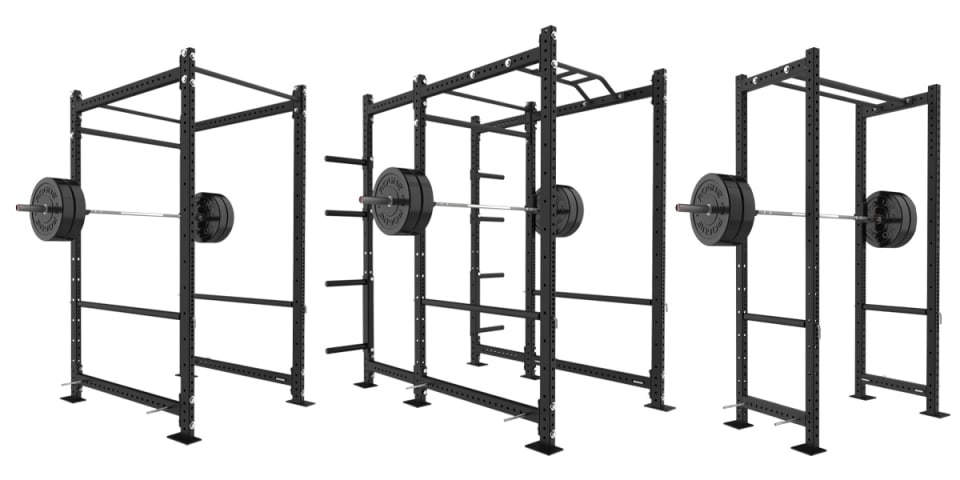
- Uses the Westside hole pattern, with 1″ spacing through the bench and clean-pull zones and 2″ spacing elsewhere
- Compatible with the Infinity J-Cup Set, Safety Spotter Arms, and Pin/Pipe Safeties
RM-43 SERIES
The RM-43 Series steps up to a 4″ x 3″ 11-gauge upright, the largest in Rogue’s rack lineup, while using the same oversized 1” hardware as the Monster Series. It’s built for the constant, high-volume use found in collegiate, professional and military training facilities, with a reinforced top joint and a wider base for extra stability beyond what the standard Monster Series offers.
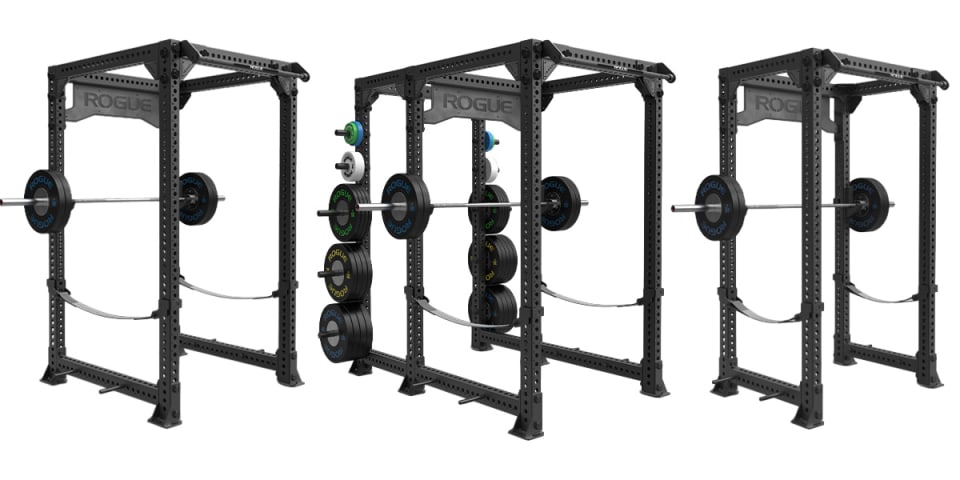
- Available in 24″, 30″ or 43″ depth options and 90”, 100”, and 108” heights
- Uses a 2” hole pattern, with numbered holes on the front and back of the uprights for quick reference
- Compatible with RM-43 J-Cups and Monster safety systems only
FLAT FOOT RACKS
The Rogue RML-390F and RM-390F trade the standard bolt-down frame for a self-stabilizing base.
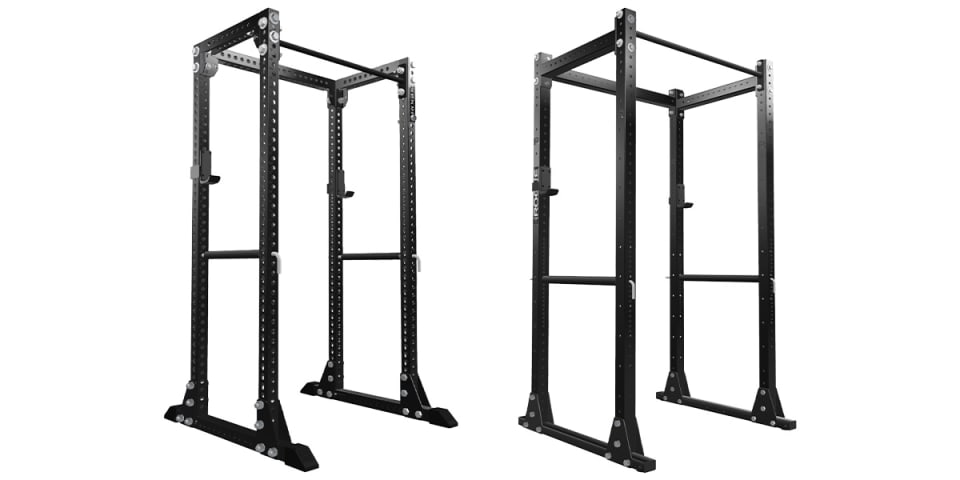
- Designed to be used safely without anchoring to the floor
- Available in both the Monster Lite (RML-390F) and Monster (RM-390F) lines
- Uses the J-Cups and safety systems built for its respective series
Setting the J-Cups
The J-Cups establish the starting height of the bar. They need to be high enough to allow a clean unrack, but low enough that you don’t have to perform an unnecessary partial squat, rise onto your toes, or overextend your arms to clear them.
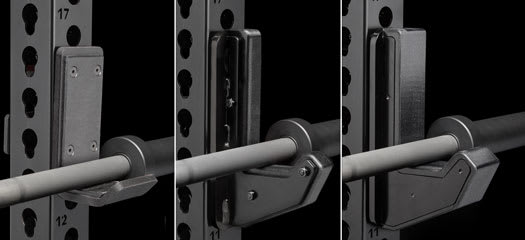
Standard Monster and Monster Lite J-Cups are both rated to 1,000+ LB and use UHMW plastic at the bar contact points. Sandwich J-Cups add a full UHMW core between the steel plates to remove metal-to-metal contact entirely, and the Ghost Roller J-Cup 2.0, sold in pin sizes for both Monster and Monster Lite, uses a roller design that makes centering the bar easier before lift-off. See the full line up of Monster and Monster Lite J-Cups.
Back Squat
- Setup: Load an empty bar into the J-Cups and stand underneath it in your normal squat position, with your usual hand and upper-back position set.
- Execution: Stand up to clear the J-Cups, take your normal walkout, and perform a controlled repetition. Return the bar so it contacts both J-Cups evenly before releasing it.
- What to check: If you have to take several steps, duck under an awkwardly positioned bar, or rise onto your toes, adjust the J-Cup height.
Front Squat
- Setup: Set the J-Cups while standing in the rack with an empty bar, since your upper-body position and grip put the bar at a different height than a back squat.
- Execution: Like the back squat, test the complete unrack with the empty bar before adding weight.
- What to check: If you have to take several steps, overextend your shoulders or arms, or rise onto your toes, adjust the J-Cup height.
Overhead Press
- Setup: Start with the bar around the height you can comfortably establish your pressing stance from, with the barbell in the front rack position.
- Execution: Unrack the barbell by extending your legs only, and step back into position.
- What to check: Because the bar travels vertically, make sure the space above and around the rack is clear of attachments, plates or storage that could interfere with the press.
Using the Safety System Correctly
J-Cups support the bar during setup. They are not the same thing as a rack’s safety system, and the correct safety option depends on which Rogue rack you own.
Pin and Pipe Safeties
The most basic safety option – a steel pin inserts through the rack’s upright holes, and a length of heavy-duty pipe slides over the pin to form a catch bar across both uprights.
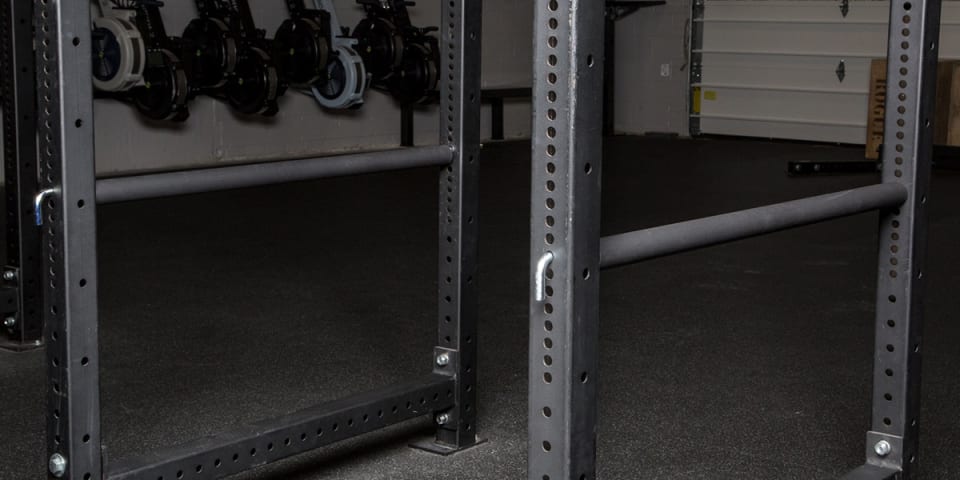
- Monster Pin and Pipe Safety Sets are built for Monster Series racks
- Infinity/Monster Lite Pin and Pipe Safeties are built for Monster Lite and Infinity racks
- Both are sold in 24″, 30″ and 43″ sizes to match different rack depths
Strap Safety Systems
Reinforced nylon straps replace the rigid horizontal catch used by pin and pipe safeties. Independent mounting brackets allow you to fully customize your safety height and angle, so you can safely fail on a lift. The nylon straps also help prevent unnecessary wear and tear on your barbell.
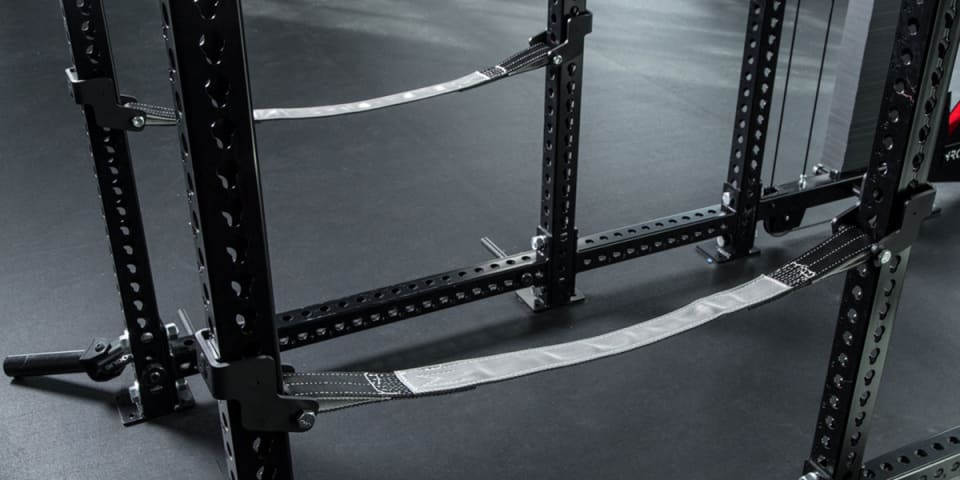
- The Monster Lite Strap Safety System 2.0 and the Monster Safety Strap System 2.0 are each built for their respective rack series, in 24″, 30″ and 43″ depth options
- Height adjusts with a J-Cup-style pin-and-swing system for the Monster Lite, while the Monster version stays on your upright and secures using its integrated locking pin, allowing it to slide up and down, locking into place where needed.
- The two strap brackets can be mounted at different heights, so a failed rep rolls the bar away from the athlete instead of straight down
Flip Down Safeties
Flip Down Safeties provide a quick-access safety option for 43″ deep Monster Racks. The safeties mount to the rack uprights and flip up or down as needed, allowing you to quickly clear the bar path when loading or unloading the rack while keeping the safeties in position for training.
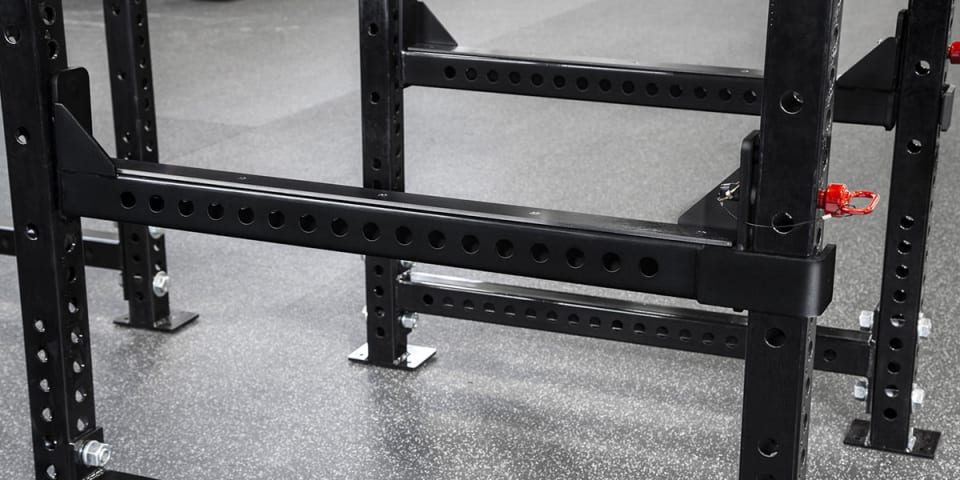
- Flip Down Safeties are available exclusively for 43″ deep Monster Series racks
- The flip-down design provides quick access to the rack without removing the safeties
- Safeties mount directly to the rack uprights and adjust to different heights for the movement being performed
- Designed for use with Rogue Monster Series 43″ deep racks
Safety Spotter Arms
Spotter arms provide an external catch point on each side of the bar.
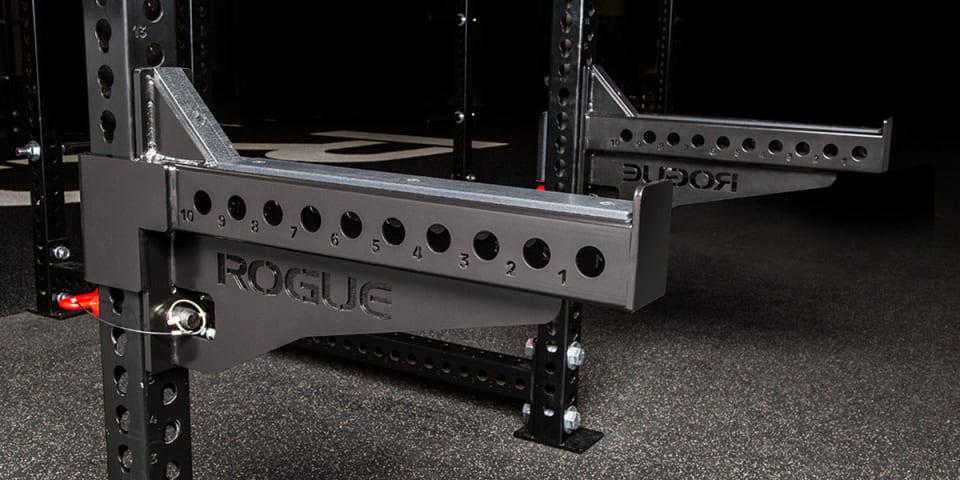
- Monster Safety Spotter Arms 2.0 are built for Monster Series racks, extending 24″ fom the rack with UHMW plastic, and are rated to catch a dropped bar up to 800LB
- SAML-24 Monster Lite Safety Spotter Arms are the Monster Lite equivalent, and Infinity Safety Spotter Arms are the Infinity equivalent
Whichever type you use, test it with an empty bar first. For squats, drop into your normal bottom position and confirm the bar clears the safety through your full range of motion, then confirm it would actually catch the bar if a rep failed.
Setting Up for Bench Press
A Rogue rack can double as a bench station when the rack, bench and safety configuration line up.
Bench Press
- Setup: Center the bench between the uprights, lie down and establish your normal pressing position and grip width. Adjust the J-Cups so the bar unracks without an excessive reach, and set the safety system below your normal bar path.
- What to check: Test the full movement with an empty bar and confirm the safeties don’t interfere with your range of motion.
The Ghost Roller J-Cup 2.0 is worth considering here. Its roller design makes bar centering easier before lift-off, and its compact profile reduces the chance of contacting the J-Cup mid-rep.
Training Alone Safely
A properly configured safety system matters most when there’s no spotter.
A rack’s enclosed design provides an advantage here: the uprights surround the lifting area on both sides of the bar path, allowing safeties to catch the bar from either direction. An open squat stand typically only provides support from one side. If you regularly train heavy movements alone, consider building your setup around a rack with a properly configured safety system.
A rack does not automatically make every failed rep safe. Safeties still need to be installed, positioned, and tested for the specific movement and setup before training.
Rogue Rack Safety Checklist
Before a heavy set, take a few seconds to check the rack or squat stand.
J-Cups
- Both J-Cups are at the intended height
- Both are fully seated in the uprights
- The bar is resting securely in the J-Cups
Beveiliging
- Pins, arms or straps are correctly installed
- Both sides are positioned at matching heights
- The safety height has been tested for the movement
Rack
- The rack is stable
- Required anchoring has been completed, or you’re using a Flat Foot Rack designed to not be anchored
- No attachments are obstructing the movement
- The surrounding training area is clear
Barbell
- The bar is centered
- Plates and collars are properly secured
- The planned load is appropriate for the session
Make the Setup Routine
The most effective Rogue rack setup is one you can reproduce every session. Know which J-Cups and safeties are built for your rack series. Set the bar at the correct height. Position the safety system around the movement instead of leaving it in a default spot.
Whether the session calls for a back squat, bench press or overhead press, the process stays the same: set the rack first, test it with an empty bar, then load the bar.