


1000LB Club Challenge (Annual)
1000LB Club Challenge (Annual)
Challenge Starts: 1/9/2026
Challenge Ends: This challenge currently does not have a scheduled end date
Challengeübersicht
CHALLENGE AND SCORING
Select your target weight tier, find your max cumulative total for the following three lifts in one hour:
- 1 Rep Max Back Squat
- 1 Rep Max Bench Press
- 1 Rep Max Deadlift
Target Weight Division Tiers:
- 500LB - 749LB (227kg - 339kg)
- 750LB - 999LB (340kg - 453kg)
- 1000LB - 1249LB (454kg - 566kg)
- 1250LB - 1499LB (567kg - 679kg)
- 1500LB + (680kg +)
Time: Athletes have a 1 hour time cap to complete the three lifts
* 1 Hour clock begins just before the first lift and does not include time to show competition gear to the camera as outlined below
* Competitors need to use Time.is or any clock that shows a time and date to validate their time window as outlined below
Athletes that submit and have their score accepted by the judges at any point during the challenge will earn the custom t-shirt
* Rejected scores and athletes that do not follow all posted rules are not eligible to earn a shirt.
This challenge is not part of the overall Rogue Challenge competition. No points are awarded on the overall leaderboard and there are no cash prizes for this challenge
Mehr lesen
1000LB CLUB
Once you have completed your challenge attempt, submit your scores and video evidence.
CHALLENGE AND SCORING
Select your target weight tier, find your max cumulative total for the following three lifts in one hour:
- 1 Rep Max Back Squat
- 1 Rep Max Bench Press
- 1 Rep Max Deadlift
Target Weight Division Tiers:
- 500LB - 749LB (227kg - 339kg)
- 750LB - 999LB (340kg - 453kg)
- 1000LB - 1249LB (454kg - 566kg)
- 1250LB - 1499LB (567kg - 679kg)
- 1500LB + (680kg +)
Time: Athletes have a 1 hour time cap to complete the three lifts
* 1 Hour clock begins just before the first lift and does not include time to show competition gear to the camera as outlined below
* Competitors need to use Time.is or any clock that shows a time and date to validate their time window as outlined below
Athletes that submit and have their score accepted by the judges at any point during the challenge will earn the custom t-shirt
* Rejected scores and athletes that do not follow all posted rules are not eligible to earn a shirt.
This challenge is not part of the overall Rogue Challenge competition. No points are awarded on the overall leaderboard and there are no cash prizes for this challenge
DEADLINES AND SUBMISSIONS
Challenge Start Date & Time: 1/9/26 at 12:00pm ET
Challenge Close Date & Time: This challenge currently does not have a scheduled end date
*Scores cannot be updated or added to the leaderboard following the competition close date and time. Please allow sufficient time for completing and submitting your score and video in advance.
SCORE SUBMISSION NOTES
- Scores will display in pounds on the leaderboard
- In order to be eligible to earn your t-shirt, our judging team needs to validate your lifts. In order to validate the lifts, athletes must record their lifts following all rules and movement standards outlined in this document. This includes showing all equipment and weight markings on the equipment clearly to the camera, and measuring the bench press width standard on the bench press barbell regardless of equipment brand used.
Submitting Your Score
- All scores are submitted on roguefitness.com/1000lb-club-challenge-registration, the same webpage that you used to register
- Upload video(s) to YouTube
*Videos must be set to public so our judges can view them
* Sound may be turned off if there is licensed music playing in the background
* Videos should be submitted using YouTube and the hyperlink added during the score submission process on Rogue's website. - Submissions that do not have video links included will not be accepted in the system
- Your score will not appear on the leaderboard until you have an accepted score ruling from a judge
Judging and The T-Shirt
- Sobald sich die Punkterichter deine Ergebnisse angesehen haben, erhältst du eine E-Mail. Darin erfährst du, ob sie deine Leistung für gültig oder ungültig erklärt haben – einschließlich einer Begründung.
- Once the judges accepted your scores and videos, your earned t-shirt will be processed and added to your earned store for you to redeem.
* Athletes will receive an email once the t-shirt has become available to redeem
* For instructions on how to access your earned store, please see the 1000lb FAQ page on the Challenge website - Wurde dein Beitrag abgelehnt, erhältst du kein T-Shirt.
Submitting a Second Score
- If a competitor receives a rejected score ruling, they may submit a new score by following the same submission steps on Rogue’s website at any time during the competition window.
- Competitors are permitted 1 "approved"/"accepted" score per registration
- Once the judging team accepts a score, the score is locked for that athlete
- Competitors are not eligible for refunds for rejected scores based on-not following rules, movement standards or on time score submissions.
VIEW THE COMPLETE THE 1000LB CHALLENGE RULES (PDF)
Eligibility Standards and Age Groups:
Male (Ages 18 and over)
- 500LB Club (227kg)
- 750LB Club (340kg)
- 1000LB Club (454kg)
- 1250LB Club (567kg)
- 1500LB Club (680kg)
Female (Ages 18 and over)
- 500LB Club (227kg)
- 750LB Club (340kg)
- 1000LB Club (454kg)
- 1250LB Club (567kg)
- 1500LB Club (680kg)
Athletes who submit a total weight that differs from their selected division will be automatically moved to the correct tier by the judging team.
To be considered as a competitor, the athlete must register for the challenge at www.roguefitness.com/challenges and follow all workout and video flows as outlined.
Erforderliches Equipment
EQUIPMENT Needed To Qualify:
- Weißes Tape zum markieren der Standard-Griffweite an der Bank
- Handy oder iPad mit Verbindung zu Time.is oder einer ähnlichen Anwendung, die live auf deinem Gerät Datum und Zeit anzeigt
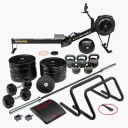
- Standard 15kg (35LB) or 20kg (45LB) Barbell
* Any style barbell is permitted including deadlift bars, power bars etc - speciality barbells are not, see below
* Shaft will need tape marks at 81 cm (31.9") apart to show the approved maximum hand placement width
* If you have questions about whether your barbell will be accepted, please email judging@roguefitness.com - Weight Plates with the weight clearly marked
* Max of 18" (45 cm) diameter
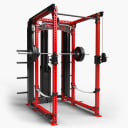
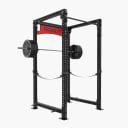
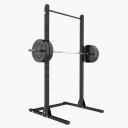
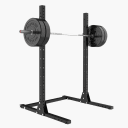
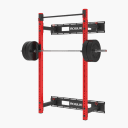
* Minimum plate increments of 1LB or 0.5kg per side - Kniebeugenständer für die Kniebeuge mit Rückenauflage und fürs Bankdrücken
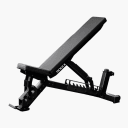
- Bank fürs Bankdrücken
- Langhantel-Verschlüsse
- Empfohlene freie Übungsfläche von 10 mal 10 Fuß (gut 3 mal 3 Meter) ohne weiteres Equipment bis auf die Stange und die Scheiben, die du für die Versuche verwendest
- Kein Marken-Equipment von Rogue erforderlich
Zulässiges Equipment:
- Magnesia (Magnesiumcarbonat)
- Gewichthebergürtel
- Knee/Elbow Sleeves (single or pairs)
* Note: Knees and elbows must remain visible to the camera and not covered by long shorts or sleeves during attempts - Manschetten/Bandagen für die Handgelenke
- Gewichtheber-Trikot
- Talkum-Puder
- Mundschutz
- Thumb tape
- Empfohlen: beliebiges Schuhwerk (nicht verpflichtend)
NICHT zulässiges Equipment:
- Klebeprodukte
- Keile oder andere Hilfsmittel zum Erhöhen der Fersen
- Griffhilfen jeglicher Art (einschließlich Liquid Grip)
- Handschuhe oder Equipment, das die Hände, die Unterarme oder den Bizeps abdeckt
- Klebebänder oder Produkte zur Verbesserung des Grips auf der Kleidung, am Körper oder auf der Stange (inklusive Spray und sonstige Produkte)
- Bandagen/Manschetten in mehreren Lagen übereinander
- Gewichtheber-Bänder jeglicher Art
- Wickelbandagen für Knie oder Ellbogen
- Mehrlagige Trikots etwa fürs Kreuzheben oder Powerlifting
- Langärmlige Hosen/Shorts/Kleidungsstücke, die deine Knie/Ellbogen bedecken
- Monolift-Ablagen
- Smith Machine
- Pads oder sonstige Polsterung der Langhantel bei der Kniebeuge mit Rückenauflage
- Specialty barbells including safety squat bars, trap bars etc.
* If you have questions about whether your barbell will be accepted, please email judging@roguefitness.com
Bei Abweichungen von den in diesem Dokument beschriebenen oder im Video gezeigten Geräten oder Übungsabläufen behalten wir uns vor, die betreffenden Sportler zu disqualifizieren.
VIEW THE COMPLETE ROGUE 1000LB CLUB CHALLENGE RULES (PDF)
Bewegungen
AUFBAU UND ABLAUF
The lifts may be performed in any order, however athlete must verify their equipment prior to the first lift
Verify Equipment and show time & date
- Show time/date device to the camera
- Athlete shows the camera all equipment to be used for the challenge and measure the bench press width standard.
* Barbell(s), to include end caps
* Using the tape measure, the athlete should measure the pre-marked 81 cm (31.9") finger marks on the barbell shaft confirming it meets the requirements listed in the movement standards above.
* It is recommended that these finger marks be pre-marked before filming begins. - All weight plates that will be used in their attempt
* Both sides of the plates
* Plates need to clearly have the weights printed on them, and both sides must be displayed to the camera
Lift 2: The Back Squat
- Halt das Gerät zur Zeit-/Datumsmessung deutlich sichtbar in die Kamera, um zu bestätigen dass du alle drei Übungen innerhalb einer Stunde absolvierst.
- Athlete loads the bar to the initial weight, showing each weight being added clearly to the camera
* Bar should already be in the rack - Wenn du die Stange beladen hast, wiederhol noch einmal deutlich hörbar das Stadtgewicht.
- Zeig vor der Kamera, dass du keine unzulässigen Hilfsmittel zur Unterstützung verwendest.
- Absolvier die Übung, indem du ganz nach unten gehst und dich anschließend wieder komplett aufrichtest (siehe Übungsanleitung oben).
- Wenn du für mehrere Versuche Gewichte auflegst, musst du deutlich vor der Kamera das ganze Equipment zeigen, das du hinzufügst.
- Wiederhol laut und deutlich das neue Hantelgewicht.
Lift 2: The Bench Press
- Athlete loads the bar to the initial weight, showing each weight being added clearly to the camera
* Tape marks on barbell shaft showing max hand placement must be visible (81 cm, 31.9") - Wenn du die Stange beladen hast, wiederhol noch einmal deutlich hörbar das Stadtgewicht.
- Zeig vor der Kamera, dass du keine unzulässigen Hilfsmittel zur Unterstützung verwendest.
- Show time/date device to the camera to confirm all 3 lifts take place within one hour of each other
* The 1 hour time window starts at this step - Absolvier die Übung. Die Stange muss in der unteren Position den Brustkorb berühren. In der oberen Position müssen deine Arme vollständig gestreckt sein. Oben findest du die Beschreibung der kompletten Übungsausführung.
- Wenn du für mehrere Versuche Gewichte auflegst, musst du deutlich vor der Kamera das ganze Equipment zeigen, das du hinzufügst.
- Wiederhol laut und deutlich das neue Hantelgewicht.
Kreuzheben (Übung 3):
- Halt das Gerät zur Zeit-/Datumsmessung deutlich sichtbar in die Kamera, um zu bestätigen dass du alle drei Übungen innerhalb einer Stunde absolvierst.
- Belade die Stange mit dem Startgewicht. Präsentier jedes Gewicht, das du hinzufügst, deutlich vor der Kamera.
- Wenn du die Stange beladen hast, wiederhol noch einmal deutlich hörbar das Stadtgewicht.
- Zeig vor der Kamera, dass du keine unzulässigen Hilfsmittel zur Unterstützung verwendest.
- Absolvier die Übung, indem du den Körper komplett aufrichtest (komplette Übungsanleitung siehe oben).
- Wenn du für mehrere Versuche Gewichte auflegst, musst du deutlich vor der Kamera das ganze Equipment zeigen, das du hinzufügst.
- Wiederhol laut und deutlich das neue Hantelgewicht.
* Du kannst jederzeit Gewichte abziehen oder hinzufügen, während du dich an deine maximale Kapazität herantastest. Wiederhol dabei einfach immer wieder den oben beschriebenen Übungsablauf.
* Du kannst von jeder Übung so viele Versuche durchführen, wie du willst.
* Du darfst dir beim Hinzufügen/Entfernen von Gewichten helfen lassen.
MOVEMENTS
The lifts may be performed in any order, however athlete must verify their equipment prior to the first lift.
Kniebeuge mit Rückenauflage:
Barbell begins in the squat rack.
- The barbell must be unracked from the squat rack without assistance.
- After unracking the bar the athlete must step back to begin the squat.
- The athlete must squat to a depth BELOW PARALLEL where the hip crease is clearly below the top of the knee with the barbell controlled in a back rack position.
* High or Low Bar positions are both acceptable - The athlete must then stand, without assistance to a position where the knees and hips are fully extended with the barbell supported in the back rack position.
- The athlete must rerack the barbell without assistance to complete the lift.
- Ensure that spotting bars / straps do not block the view required to verify the movement standards required for the back squat - to a depth clearly below parallel.
Bench Press:
A spotter/assistant to help lift the bar out of the rack is strongly recommended but NOT required. Spotters may help to assist with taking the bar out of the rack to the starting position with the athletes arms fully extended and the bar fully supported over the chest by the athlete. Once the assistant lets go of the bar at the starting position, they may not touch the bar again until helping to re-rack when the lift is done.
- The acceptable body position for the one repetition is as follows:
* Both complete shoulder blades and the glutes must be in contact with the bench pad at all times. If either comes off of the pad during a lift, the lift will not count.
* In order to achieve firm footing, lifter may have plates or blocks under their feet. If either foot comes off of the floor or plates during a lift the lift will not count.
* Hooking of feet/legs around the bench supports is not permitted.
* Per IPF standards, the spacing of the hands can not exceed 81 cm (31.9") measured between the index fingers. The maximum grip width permitted will have each index finger on or inside the 81 cm (31.9") marks at each end of the bar shaft. If the hands move outside of the designated markings during a lift attempt that single repetition will not be counted.
* These lines need to be clearly marked and visible on the barbell shaft with chalk. Failure to have these lines clearly marked and visible makes the athletes score subject to penalty at the judge's discretion.
* Both hands must remain on the barbell during the entire repetition and must remain within in contact with the markings at all times. - When the athlete has full unassisted control of the barbell extended over their chest after the initial unrack, they may begin their attempt by lowering the bar to the chest. There must be clear contact with the chest. Once contact has been made the athlete will then press the bar back to the starting position with the elbows clearly extended and the bar over the chest. Once the arms are fully extended, the athlete must show a pause to demonstrate full control prior to reracking the barbell.
- Deliberately bouncing the barbell off the chest may be interpreted as trying to gain an unfair advantage and could result in a penalty being assessed.
Kreuzheben:
Barbell begins on the floor.
- Es handelt sich hier um das herkömmliche Kreuzheben, bei dem sich die Hände außerhalb der Knie befinden. Die Sumo-Variante ist nicht zulässig.
- Any style of grip is allowed.
- Heb die Stange in die Endposition, indem du die Hüfte und die Knie komplett durchstreckst. Der Kopf und die Schultern sind in der oberen Position hinter der Stange.
- Once the athlete reaches the required finishing position they will lower the barbell to the ground while maintaining control of the bar. Dropping the bar is NOT allowed.
Any athlete who alters/modifies the equipment or movements described in this document or shown in the video standards may be disqualified from the competition if deemed by the head judges to give an unfair advantage.
Standards für Kniebeugen
STUDIOS/TEILNEHMER IN GRUPPEN
Du kannst diese Challenge mit einer ganzen Gruppe durchführen. Wenn ihr die Challenge miteinander in Angriff nehmt, gelten die folgenden abgewandelten Anweisungen zur Erstellung des Videos:
- Stellt zu Beginn des Videos einzeln alle Gruppenmitglieder vor, die an der Challenge teilnehmen. Gebt euren Namen und eure Klassen an.
- Präsentiert das gesamte Equipment und alle Gewichtsmarkierungen auf dem Equipment gut sichtbar vor der Kamera. Messt die Standardbreite fürs Bankdrücken auf der dafür vorgesehenen Langhantel oder der erforderlichen Ausrüstung (unabhängig von der Marke des Equipments).
- Achtet darauf, dass während der gesamten Sitzung das Datum und die Zeit im Hintergrund sichtbar sind. Die andere Option wäre, dass jeder Teilnehmer vor dem eigenen Versuch die Zeit und das Datum vor der Kamera präsentiert.
- Vor dem eigenen Versuch muss jeder das Datum und die Zeit gut sichtbar in der Kamera zeigen. Außerdem muss der Sportler vor der Kamera seinen Namen angeben und das Gewicht zeigen, mit dem er den Versuch startet.
- Wenn du dein Ergebnis abschickst, gib in das Kommentarfeld die zugehörige Zeitsignatur innerhalb des Videos ein. Das erleichtert den Punkterichtern die Suche nach dem zu wertenden Versuch.
- Wenn du dein Ergebnis einreichst, gib bitte auch den Namen des Studios an, in dem du die Challenge absolviert hast.
Equipment Verification Video Standards
IMPORTANT: The lifts may be performed in any order, however athlete must verify their equipment prior attempting their 1st lift.
For this challenge, athletes should submit 3 separate videos. 1 video for each movement. The equipment verification step should be included at the beginning of the video for lift 1 and shot with a fisheye lens or similar lens may be rejected due to the visual distortion these lenses cause. Sound maybe on or off. Be sure the athlete has adequate space to safely complete the movement and clear the area of all extra equipment, people, or other obstructions so that the video is clear.
The verification process should should follow the steps outlined below:
- The submitted video should start with the entire athlete in frame stating their name, the challenge name and declaring the order they will perform the movements in.
- The athlete must open their time device and clearly show the time and date reading to the camera. Please verbally confirm the date and time showing.
* Note: Your 1 hour time window does not being until just before you show time.is prior to your first lift - The camera should then clearly show all equipment to be used for the challenge and measure the bench press width standard. All of the following must be shown:
* Barbell(s), to include end caps
* Using the tape measure, the athlete should measure the pre-marked 81 cm (31.9") finger marks on the barbell shaft confirming it meets the requirements listed in the movement standards above.
* It is recommended that these finger marks be pre-marked before filming begins.
* All weight plates that will be used in their attempt
* Both sides of the plates
* Plates need to clearly have the weights printed on them, and both sides must be displayed to the camera
After this has been completed, the athlete may move to the sequences outlined below for their chosen 1st lift
Back Squat VIDEO SUBMISSION STANDARDS
IMPORTANT: The lifts may be performed in any order, however athlete must verify their equipment prior to the first lift as outline in the "Equipment Verification Video Standards" section
For this challenge, athletes should submit 3 separate videos. 1 video for each movement. Videos shot with a fisheye lens or similar lens may be rejected due to the visual distortion these lenses cause. Sound maybe on or off. Be sure the athlete has adequate space to safely complete the movement and clear the area of all extra equipment, people, or other obstructions so that the video is clear.
Wähl einen Aufnahmewinkel von 45 Grad, damit im Video dein ganzer Körper gut zu erkennen ist. Die zentralen Elemente, die im Video deutlich sichtbar sein müssen:
- Clearly show to the camera the camera the weight being added to the barbell for each lift, and state the load to be attempted
- Clearly show the lift so that movement standards can be verified. Ensure the view recorded clearly shows the hip crease below the top of the knee and that is it not obstructed by the squat rack and/or safety arms.
Folg anschließend den unten beschriebenen Schritten:
- The submitted video should start with the entire athlete in frame stating their name, the challenge name and "back squat attempt".
- The athlete must open their time device and clearly show the time and date reading to the camera. Please verbally confirm the date and time showing.
* This step is to confirm the athlete is still within their 1 hour time window
- The camera should then show the bar being racked and the load of the first lift being loaded onto the bar.
* The bar may be racked before the video begins
* Clearly show to the camera the weight being added to the barbell for each lift
* Once loaded, verbally confirm the load to be attempted to the camera, ensuring the video can confirm this load
* A coach or helper can assist with this process - The athlete needs to show the camera all supportive equipment they are wearing or will wear for the challenge to confirm it all matches the rules outlined.
- The camera should move back into the correct 45 degree filming angle for the challenge attempt.
* The final position should capture all movement standards to be able to verify the lift, refer to the movement standards above
* Ensure that spotting bars / straps do not block the view required to verify the movement standards required for the back squat - to a depth clearly below parallel. - Once the athlete is ready they may begin their lift based on the criteria outlined above.
- Once the athlete is ready they may begin their lift based on the criteria outlined above.
- If changing the load and completing multiple attempts;
* Clearly show all weights being added/removed to the camera for each attempt
* Verbally confirm loads being added/removed
* Verbally confirm new load to be attempted
* A coach or helper can assist with this process
- Once final lift is completed show and confirm last successful load lifted.
* Wir können dein Video nur annehmen, wenn es eine durchgängige Aufnahme der oben beschriebenen Abläufe enthält.
* Bei Abweichungen von den obigen Schritten und Anforderungen musst du damit rechnen, dass unsere Punktrichter dein Video ablehnen.
* Schau dir auch das Standard-Demovideo auf der Rogue Website an, um dir einen Überblick über den Aufbau des Workouts und des Videos zu verschaffen.
Bankdrückstandards
STUDIOS/TEILNEHMER IN GRUPPEN
Du kannst diese Challenge mit einer ganzen Gruppe durchführen. Wenn ihr die Challenge miteinander in Angriff nehmt, gelten die folgenden abgewandelten Anweisungen zur Erstellung des Videos:
- Stellt zu Beginn des Videos einzeln alle Gruppenmitglieder vor, die an der Challenge teilnehmen. Gebt euren Namen und eure Klassen an.
- Präsentiert das gesamte Equipment und alle Gewichtsmarkierungen auf dem Equipment gut sichtbar vor der Kamera. Messt die Standardbreite fürs Bankdrücken auf der dafür vorgesehenen Langhantel oder der erforderlichen Ausrüstung (unabhängig von der Marke des Equipments).
- Achtet darauf, dass während der gesamten Sitzung das Datum und die Zeit im Hintergrund sichtbar sind. Die andere Option wäre, dass jeder Teilnehmer vor dem eigenen Versuch die Zeit und das Datum vor der Kamera präsentiert.
- Vor dem eigenen Versuch muss jeder das Datum und die Zeit gut sichtbar in der Kamera zeigen. Außerdem muss der Sportler vor der Kamera seinen Namen angeben und das Gewicht zeigen, mit dem er den Versuch startet.
- Wenn du dein Ergebnis abschickst, gib in das Kommentarfeld die zugehörige Zeitsignatur innerhalb des Videos ein. Das erleichtert den Punkterichtern die Suche nach dem zu wertenden Versuch.
- Wenn du dein Ergebnis einreichst, gib bitte auch den Namen des Studios an, in dem du die Challenge absolviert hast.
Equipment Verification Video Standards
IMPORTANT: The lifts may be performed in any order, however athlete must verify their equipment prior attempting their 1st lift.
For this challenge, athletes should submit 3 separate videos. 1 video for each movement. The equipment verification step should be included at the beginning of the video for lift 1 and shot with a fisheye lens or similar lens may be rejected due to the visual distortion these lenses cause. Sound maybe on or off. Be sure the athlete has adequate space to safely complete the movement and clear the area of all extra equipment, people, or other obstructions so that the video is clear.
The verification process should should follow the steps outlined below:
- The submitted video should start with the entire athlete in frame stating their name, the challenge name and declaring the order they will perform the movements in.
- The athlete must open their time device and clearly show the time and date reading to the camera. Please verbally confirm the date and time showing.
* Note: Your 1 hour time window does not being until just before you show time.is prior to your first lift - The camera should then clearly show all equipment to be used for the challenge and measure the bench press width standard. All of the following must be shown:
* Barbell(s), to include end caps
* Using the tape measure, the athlete should measure the pre-marked 81 cm (31.9") finger marks on the barbell shaft confirming it meets the requirements listed in the movement standards above.
* It is recommended that these finger marks be pre-marked before filming begins.
* All weight plates that will be used in their attempt
* Both sides of the plates
* Plates need to clearly have the weights printed on them, and both sides must be displayed to the camera
After this has been completed, the athlete may move to the sequences outlined below for their chosen 1st lift
VORGABEN ZUR EINREICHUNG VON VIDEOS FÜRS BANKDRÜCKEN
IMPORTANT: The lifts may be performed in any order, however athlete must verify their equipment prior to the first lift as outline in the "Equipment Verification Video Standards" section
For this challenge, athletes should submit 3 separate videos. 1 video for each movement. Videos shot with a fisheye lens or similar lens may be rejected due to the visual distortion these lenses cause. Sound maybe on or off. Be sure the athlete has adequate space to safely complete the movement and clear the area of all extra equipment, people, or other obstructions so that the video is clear.
Wähl einen Aufnahmewinkel von 45 Grad, damit im Video dein ganzer Körper gut zu erkennen ist. Die zentralen Elemente, die im Video deutlich sichtbar sein müssen:
- Präsentier das gesamte Equipment und alle Gewichtsmarkierungen auf dem Equipment gut sichtbar vor der Kamera. Miss die Standardbreite fürs Bankdrücken auf der dafür vorgesehenen Langhantel.
- Zeig vor der Kamera vor jedem Versuch gut sichtbar das Gewicht, das du auf die Langhantel aufschiebst. Wiederhol außerdem laut und deutlich, mit welchen Gewicht du die Übung absolvieren willst.
- Clearly show the lift so that movement standards can be verified
Folg anschließend den unten beschriebenen Schritten:
- The submitted video should start with the entire athlete in frame stating their name, the challenge name and "bench press attempt".
- The camera should then show the bar set for the opening weight attempt
* Clearly show to the camera the plates being added to the camera to the bar
* Once loaded, verbally confirm the load to be attempted to the camera, ensuring the video can confirm this load
* A coach or helper can assist with this process - The athlete must open their time device and clearly show the time and date reading to the camera. Please verbally confirm the date and time showing.
* At this time, the athlete's 1 hour time window to complete the challenge begins - The athlete needs to show the camera all supportive equipment they are wearing or will wear for the challenge to confirm it all matches the rules outlined.
- The camera should move back into the correct 45 degree filming angle for the challenge attempt.
* The final position should capture all movement standards to be able to verify the lift, refer to the movement standards above - Once the athlete is ready they may begin their lift based on the criteria outlined above.
- If changing the load and completing multiple attempts;
* Clearly show all weights being added/removed to the camera for each attempt
* Verbally confirm loads being added/removed
* Verbally confirm new load to be attempted
* A coach or helper can assist with this process - Once final lift is completed show and confirm last successful load lifted.
- Du kannst dann das Video mit dem Bankdrücken beenden.
* Wir können dein Video nur annehmen, wenn es eine durchgängige Aufnahme der oben beschriebenen Abläufe enthält.
* Bei Abweichungen von den obigen Schritten und Anforderungen musst du damit rechnen, dass unsere Punktrichter dein Video ablehnen.
* Schau dir auch das Standard-Demovideo auf der Rogue Website an, um dir einen Überblick über den Aufbau des Workouts und des Videos zu verschaffen.
Standards für Kreuzheben
STUDIOS/TEILNEHMER IN GRUPPEN
Du kannst diese Challenge mit einer ganzen Gruppe durchführen. Wenn ihr die Challenge miteinander in Angriff nehmt, gelten die folgenden abgewandelten Anweisungen zur Erstellung des Videos:
- Stellt zu Beginn des Videos einzeln alle Gruppenmitglieder vor, die an der Challenge teilnehmen. Gebt euren Namen und eure Klassen an.
- Präsentiert das gesamte Equipment und alle Gewichtsmarkierungen auf dem Equipment gut sichtbar vor der Kamera. Messt die Standardbreite fürs Bankdrücken auf der dafür vorgesehenen Langhantel oder der erforderlichen Ausrüstung (unabhängig von der Marke des Equipments).
- Achtet darauf, dass während der gesamten Sitzung das Datum und die Zeit im Hintergrund sichtbar sind. Die andere Option wäre, dass jeder Teilnehmer vor dem eigenen Versuch die Zeit und das Datum vor der Kamera präsentiert.
- Vor dem eigenen Versuch muss jeder das Datum und die Zeit gut sichtbar in der Kamera zeigen. Außerdem muss der Sportler vor der Kamera seinen Namen angeben und das Gewicht zeigen, mit dem er den Versuch startet.
- Wenn du dein Ergebnis abschickst, gib in das Kommentarfeld die zugehörige Zeitsignatur innerhalb des Videos ein. Das erleichtert den Punkterichtern die Suche nach dem zu wertenden Versuch.
- Wenn du dein Ergebnis einreichst, gib bitte auch den Namen des Studios an, in dem du die Challenge absolviert hast.
Equipment Verification Video Standards
IMPORTANT: The lifts may be performed in any order, however athlete must verify their equipment prior attempting their 1st lift.
For this challenge, athletes should submit 3 separate videos. 1 video for each movement. The equipment verification step should be included at the beginning of the video for lift 1 and shot with a fisheye lens or similar lens may be rejected due to the visual distortion these lenses cause. Sound maybe on or off. Be sure the athlete has adequate space to safely complete the movement and clear the area of all extra equipment, people, or other obstructions so that the video is clear.
The verification process should should follow the steps outlined below:
- The submitted video should start with the entire athlete in frame stating their name, the challenge name and declaring the order they will perform the movements in.
- The athlete must open their time device and clearly show the time and date reading to the camera. Please verbally confirm the date and time showing.
* Note: Your 1 hour time window does not being until just before you show time.is prior to your first lift - The camera should then clearly show all equipment to be used for the challenge and measure the bench press width standard. All of the following must be shown:
* Barbell(s), to include end caps
* Using the tape measure, the athlete should measure the pre-marked 81 cm (31.9") finger marks on the barbell shaft confirming it meets the requirements listed in the movement standards above.
* It is recommended that these finger marks be pre-marked before filming begins.
* All weight plates that will be used in their attempt
* Both sides of the plates
* Plates need to clearly have the weights printed on them, and both sides must be displayed to the camera
After this has been completed, the athlete may move to the sequences outlined below for their chosen 1st lift
deadlift VIDEO SUBMISSION STANDARDS
IMPORTANT: The lifts may be performed in any order, however athlete must verify their equipment prior to the first lift as outline in the "Equipment Verification Video Standards" section
Für diese Challenge musst du drei separate Videos einreichen (ein Video pro Übung). Wir behalten uns vor, mit einem Fischauge oder ähnlichen Objektiven gedrehte Videos aufgrund der Bildverzerrung abzulehnen. Den Ton kannst du ein- oder ausschalten. Stell sicher, dass der Sportler genügend Platz hat, um alle Übungen sicher auszuführen. Der Bildausschnitt sollte frei von unnötigem Equipment, nicht beteiligten Personen oder Hindernissen sein, damit der zentrale Inhalt klar zu sehen ist.
Wähl einen Aufnahmewinkel von 45 Grad, damit im Video dein ganzer Körper gut zu erkennen ist. Die zentralen Elemente, die im Video deutlich sichtbar sein müssen:
- Zeig vor der Kamera vor jedem Versuch gut sichtbar das Gewicht, das du auf die Langhantel aufschiebst. Wiederhol außerdem laut und deutlich, mit welchen Gewicht du die Übung absolvieren willst.
- Clearly show the lift so that movement standards can be verified
Folg anschließend den unten beschriebenen Schritten:
- The submitted video should start with the entire athlete in frame stating their name, the challenge name and "deadlift attempt".
- The athlete must open their time device and clearly show the time and date reading to the camera. Please verbally confirm the date and time showing.
* This step is to confirm the athlete is still within their 1 hour time window
- The camera should then show the bar being loaded for their first lift attempt.
* Clearly show the camera the weight being added to the barbell for each lift
* Once loaded, verbally confirm the load to be attempted to the camera, ensuring the video can confirm this load
* A coach or helper can assist with this process
- Zeig vor der Kamera jegliche Hilfsmittel, die du trägst oder für die Challenge anlegen willst – als Beleg dafür, dass du gegen keine der Regeln verstößt.
- The camera should move back into the correct 45 degree filming angle for the challenge attempt.
* The final position should capture all movement standards to be able to verify the lift, refer to the movement standards above
- Sobald du bereit bist, kannst du mit der Übung beginnen. Beachte dabei bitte die obigen Vorgaben.
- If changing the load and completing multiple attempts;
* Clearly show all weights being added/removed to the camera for each attempt
* Verbally confirm loads being added/removed
* Verbally confirm new load to be attempted
* A coach or help can assist with this process - Once final lift is completed show and confirm last successful load lifted.
* Wir können dein Video nur annehmen, wenn es eine durchgängige Aufnahme der oben beschriebenen Abläufe enthält.
* Bei Abweichungen von den obigen Schritten und Anforderungen musst du damit rechnen, dass unsere Punktrichter dein Video ablehnen.
* Schau dir auch das Standard-Demovideo auf der Rogue Website an, um dir einen Überblick über den Aufbau des Workouts und des Videos zu verschaffen.
Leaderboard
Challenge-Bestenliste
Page 1